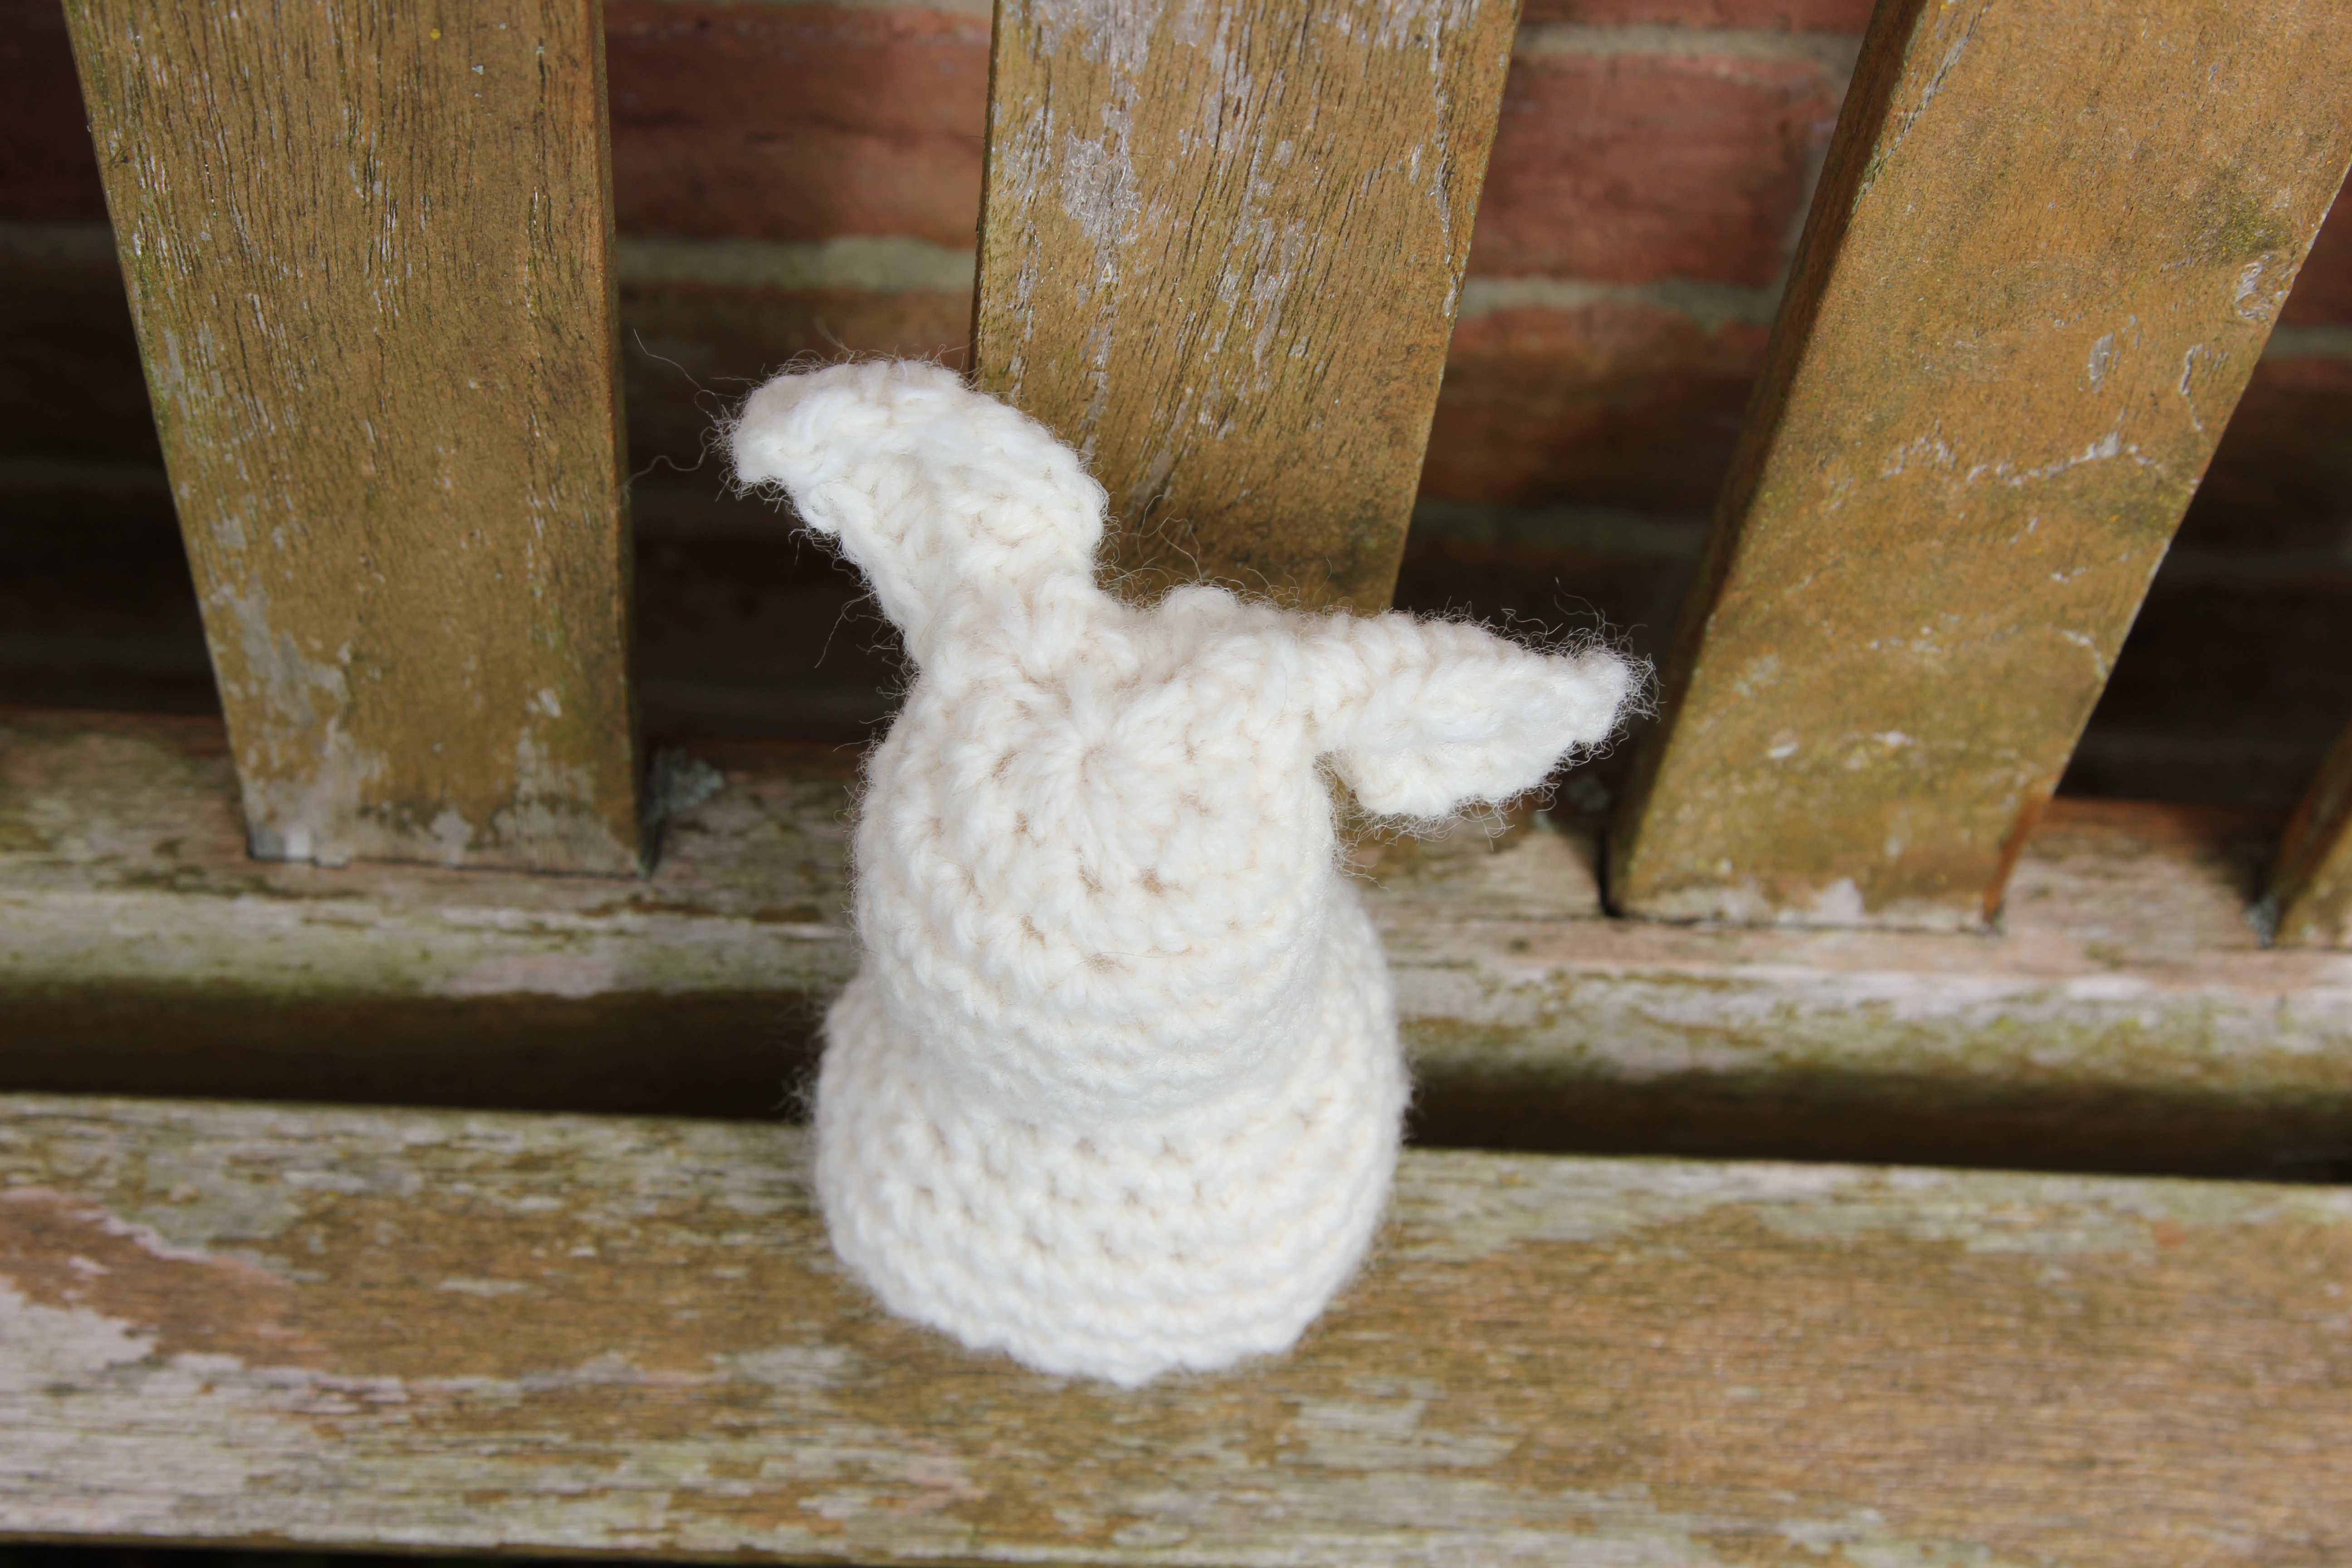
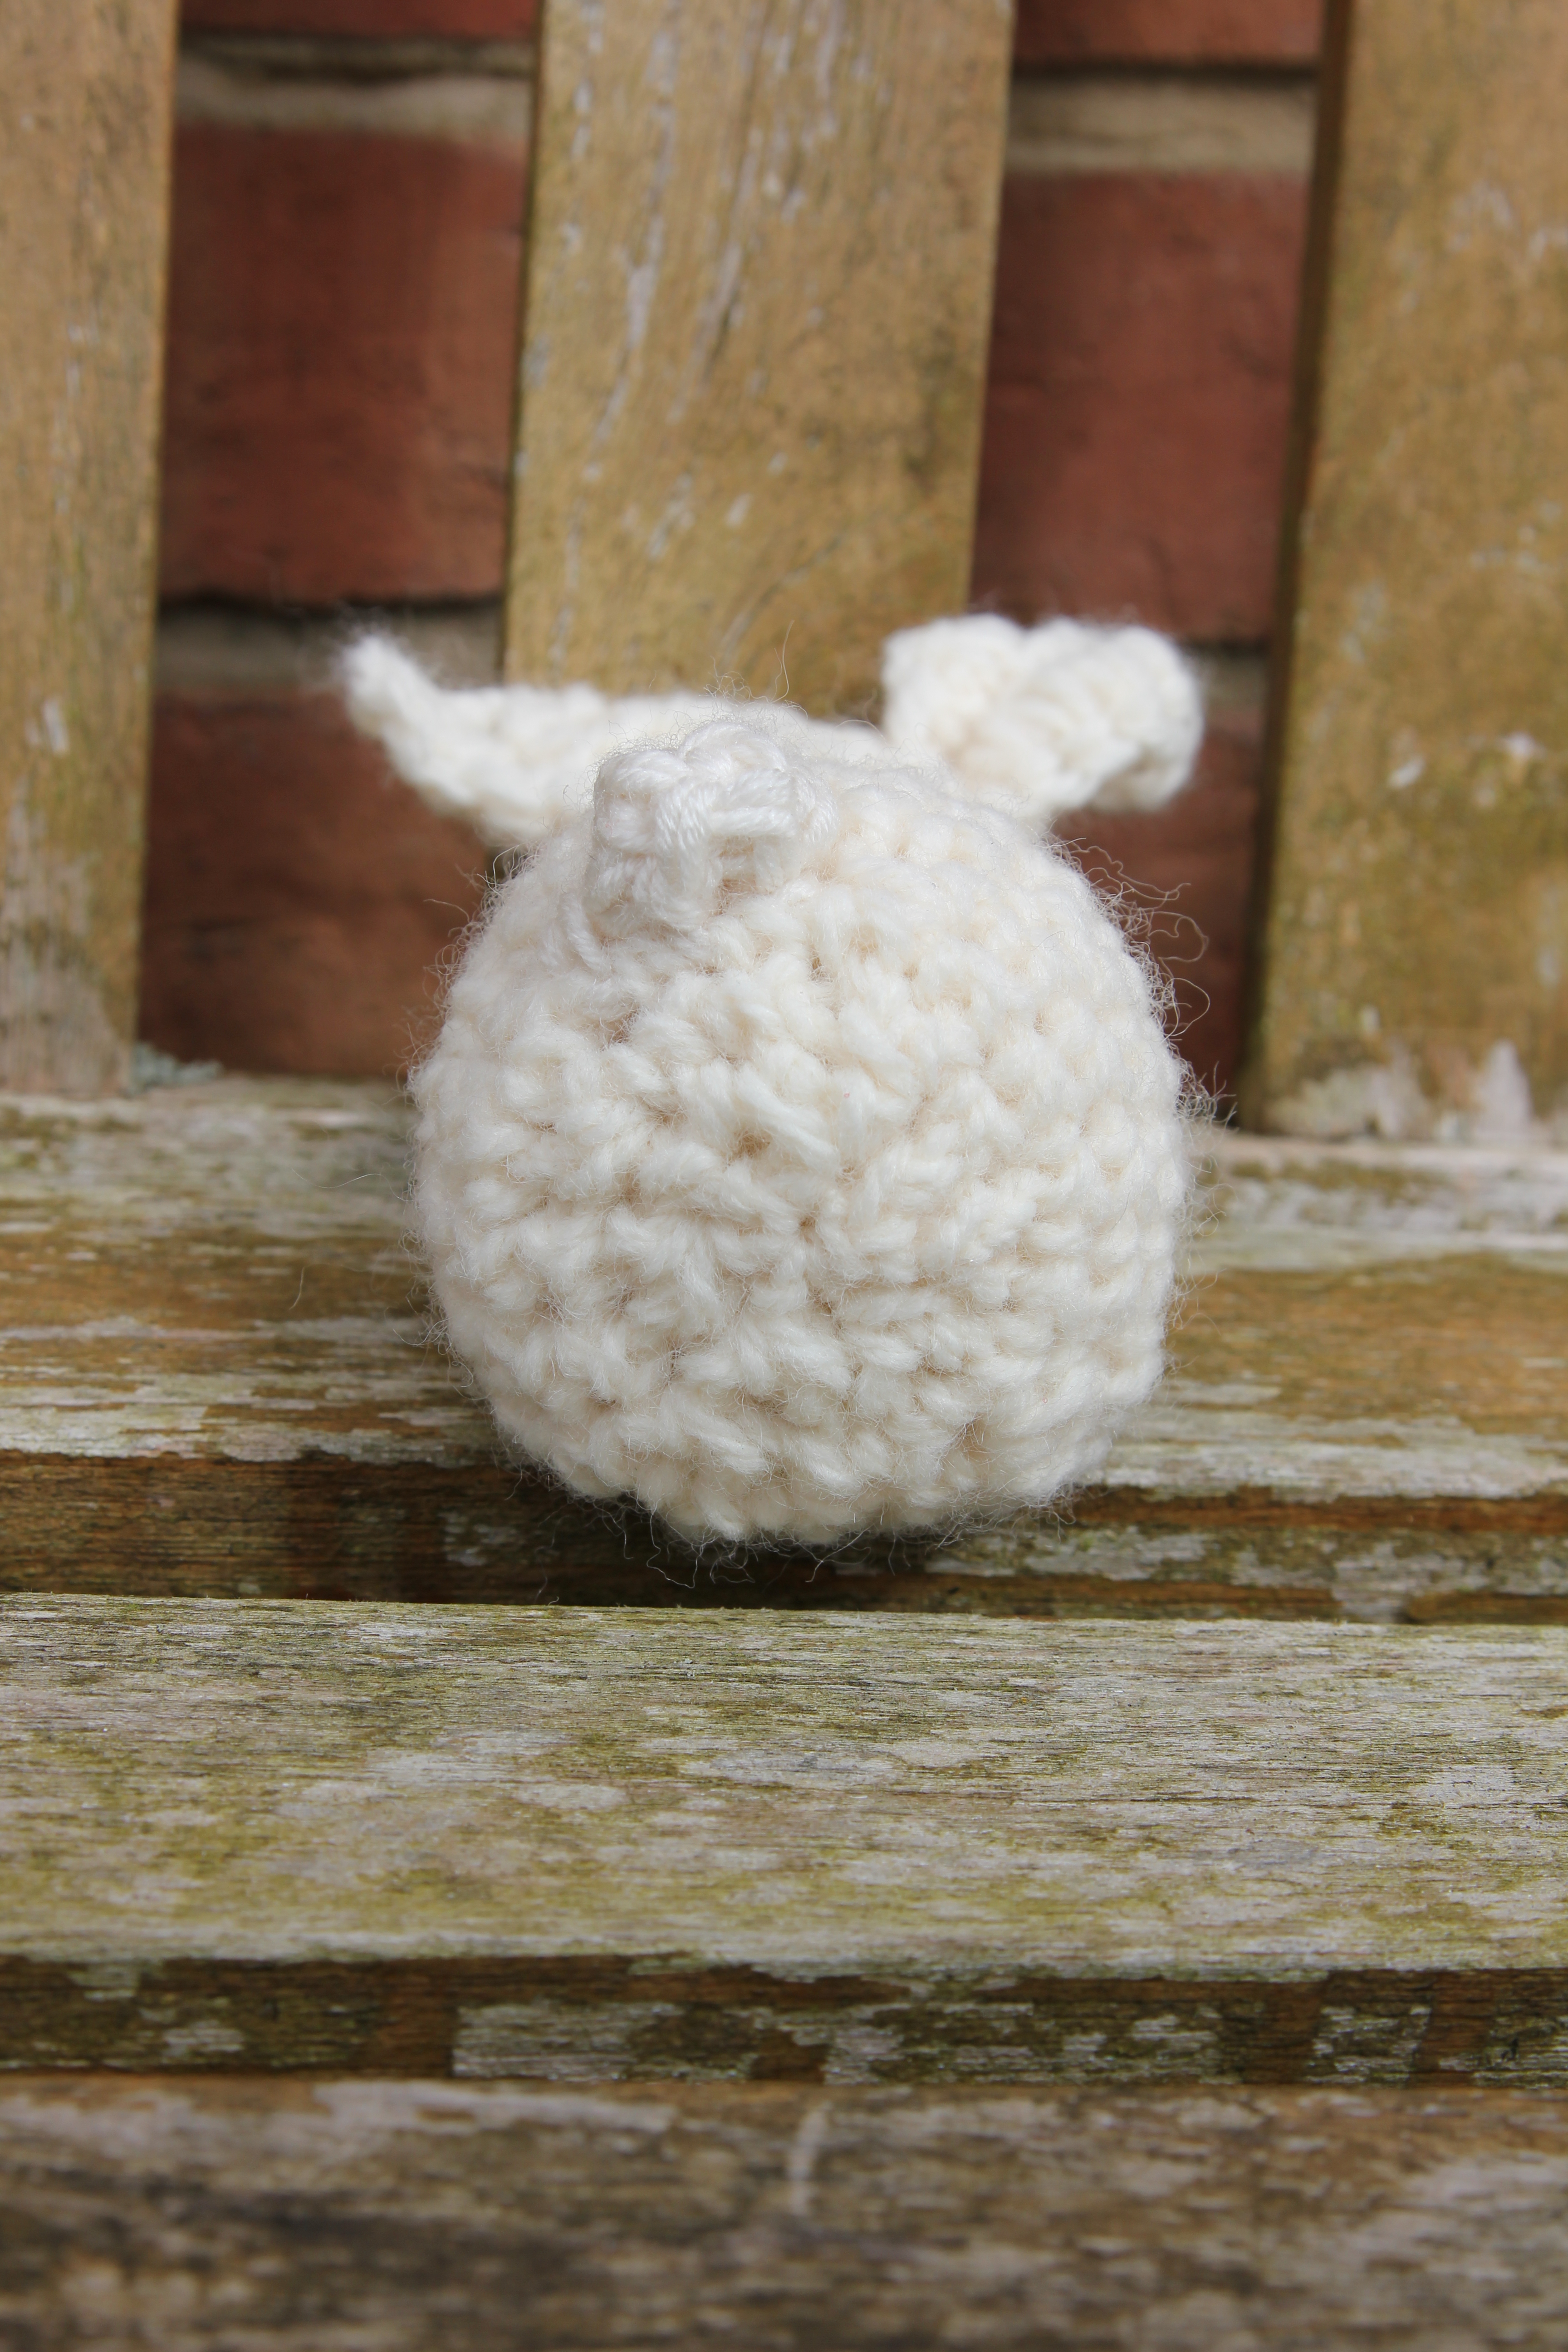
 The bent-eared Bunny is the most noble of breeds, born out of a happy accident with a crochet hook and some triple trebles.
If you like your stuffed Easter things quick to make and Amigurumi-style then this Bunny could be for you!
Gauge/yarn/tools
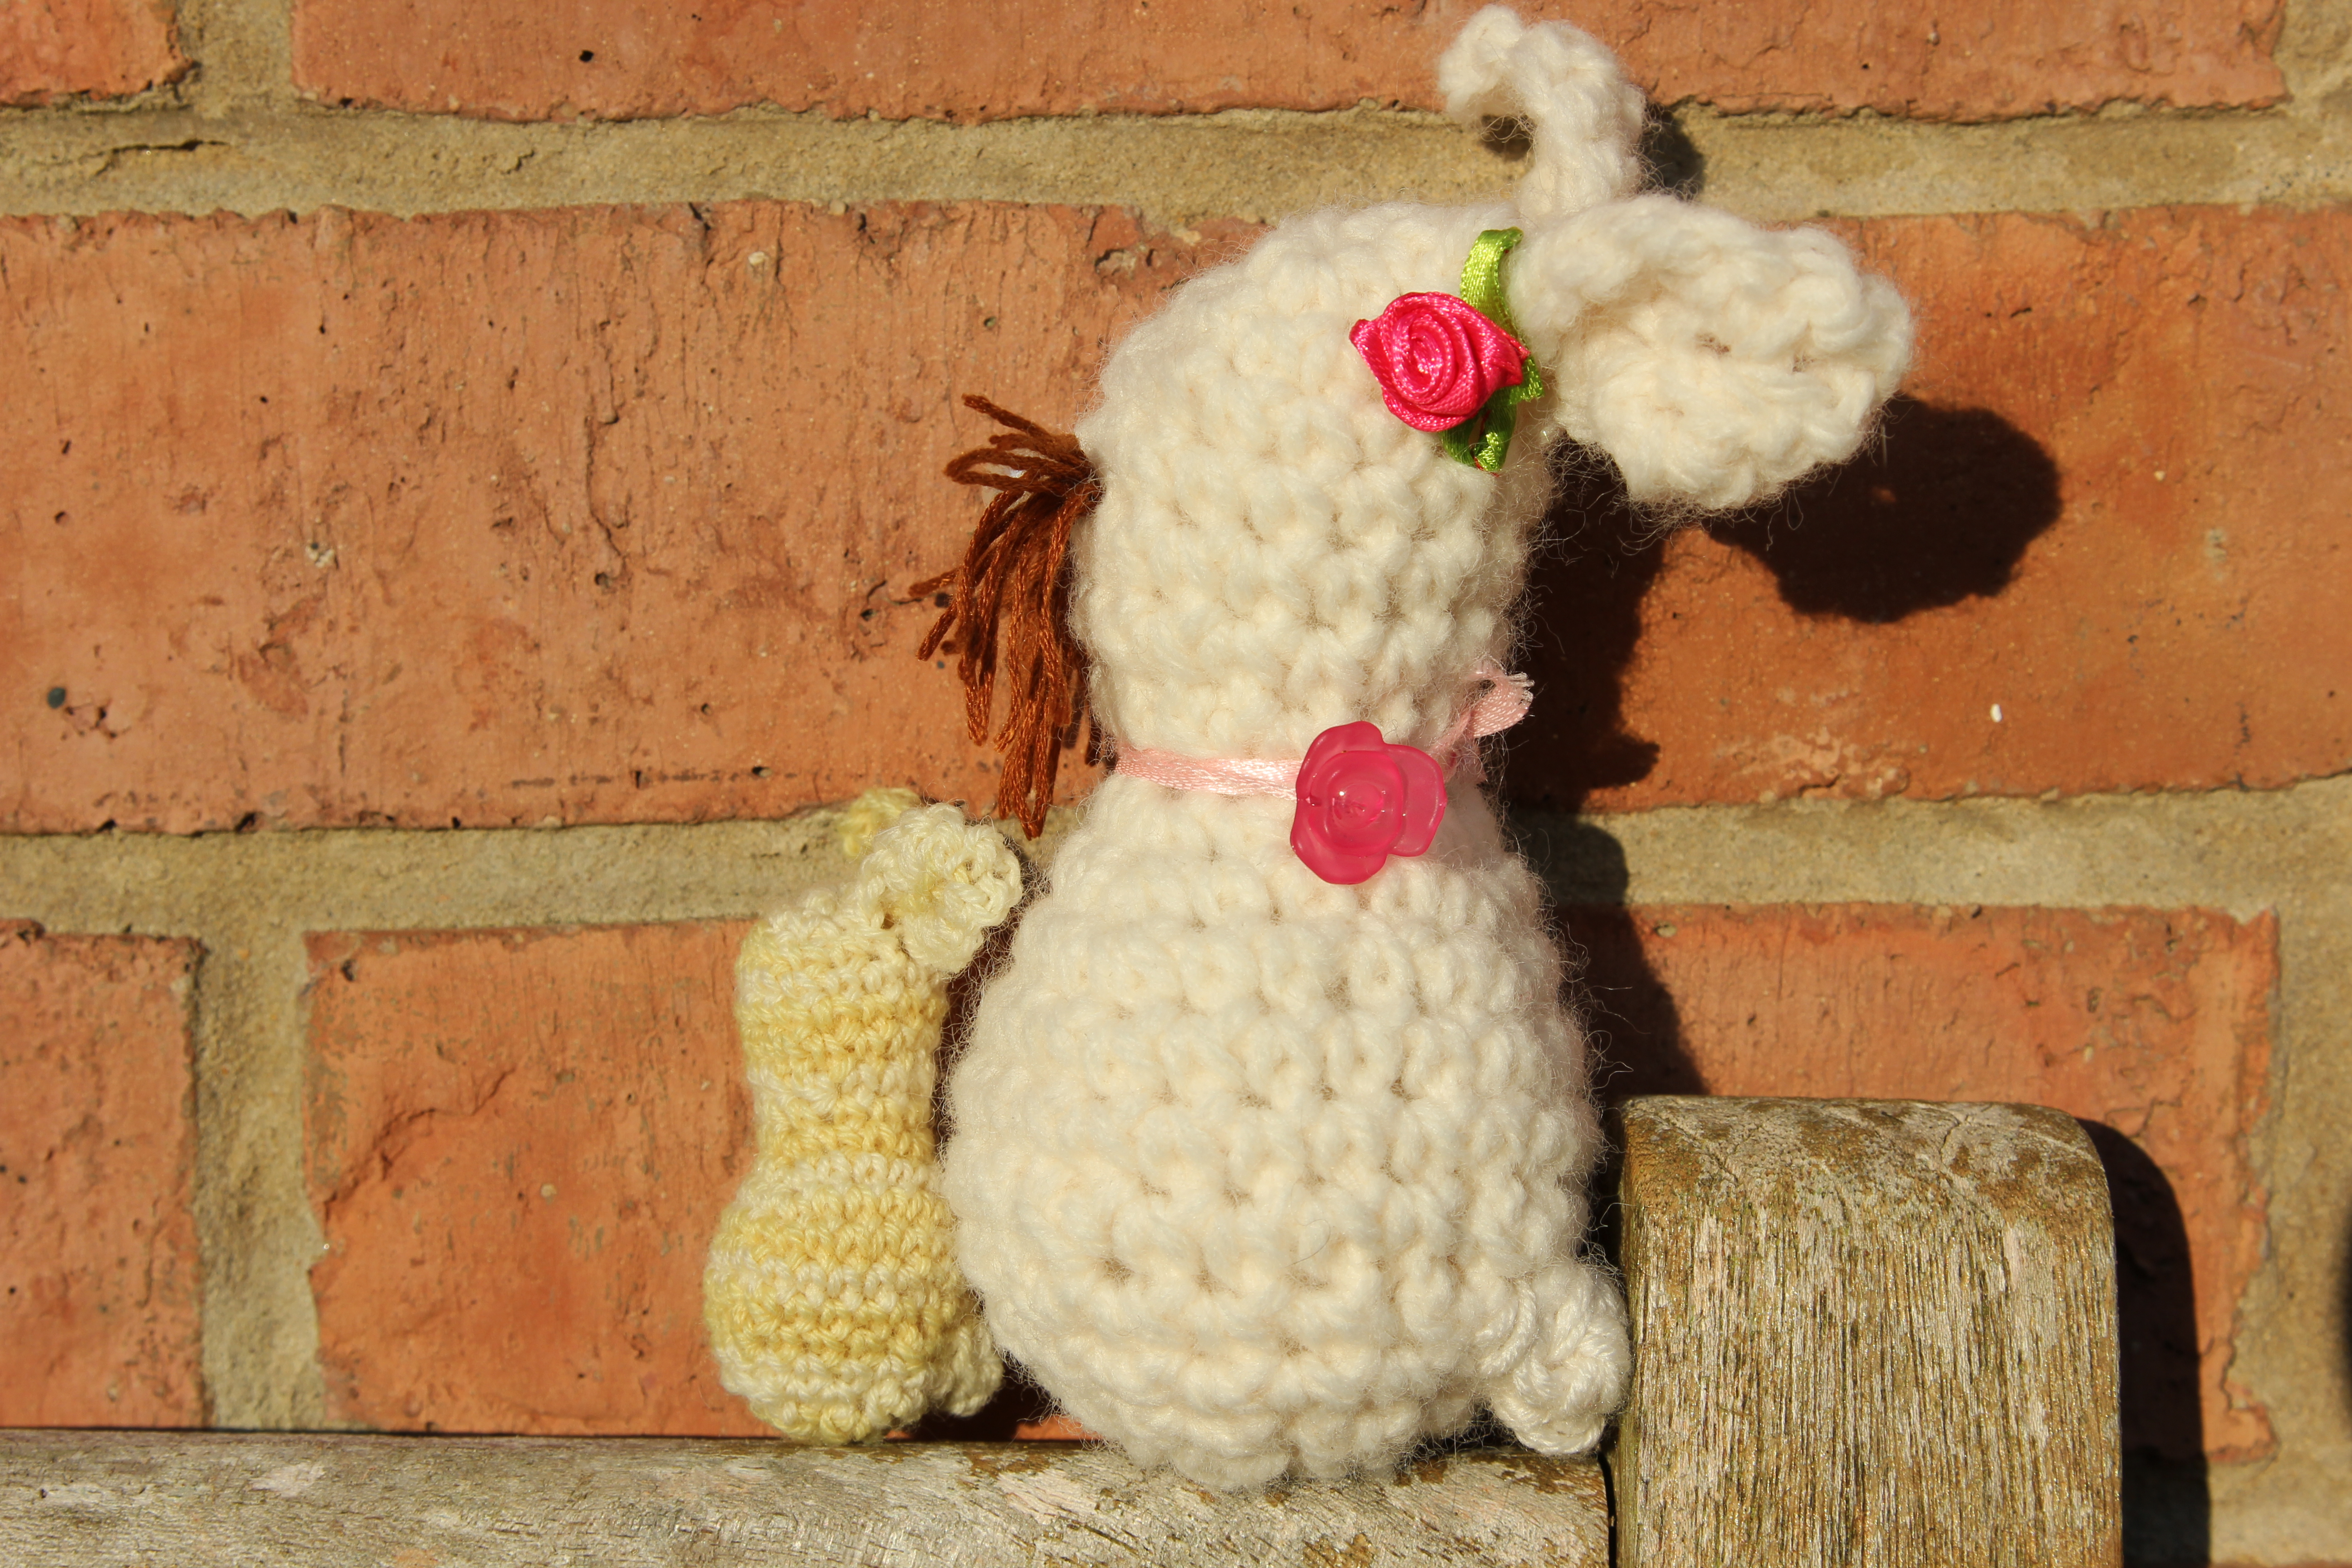
Gauge is not important as you can make this from a yarn of your choosing along with a hook that’s appropriate. In the picture above the small yellow bunny was built using 4 ply/fingering weight yarn and a 2.75 mm hook. The big bunny is rendered in aran (10 ply?) and I used a 6 mm hook. Before I stuffed the big bunny she weighed 10 grams, I think the little bunny must weigh less than 5 grams. If I had to make a guess I think that you might need 20 metres of 4 ply. As for decoration, I prefer my animals plain as in decorating them I seem to remove all their character. However, big bunny above was blinged up by the youngest child so I leave you free to do as you choose. If you’re giving your bunny as a toy to someone with a small oesophagus don’t sew on anything that can be chewed or yanked off and then represent a choking hazard.
A pair of scissors will be useful, because you know none of us ever use our teeth to cut our yarn *conspiratorial wink*. A tapestry needle can also be employed at some point near the finish. Oh and something safe to stuff it with, and maybe a stitch marker (a small safety pin suffices).
Difficulty
The ears are perhaps the trickiest part, take your time. I recommend starting with a magic ring, trying your hand at an invisible decrease and most absolutely, definitely using the ultimate finish.
Pattern
I’m using UK crochet terms, here’s a UK/US conversion chart. We’re creating our bunny from the top down, all in one piece. We’re going to spiral around, there will be no slip stitches to join between rounds because I don’t like how it looks. Feel free to do that if it’s your thing. Sitting comfortably? Yarn, hook and hot beverage of your choice at the ready? Let’s begin:
Making the head.
Round 1: Using a Magic Ring, chain 1, 3 double crochet, 2 chain (first ear), 1 double crochet, 2 chain (second ear), 4 double crochet. Mark your last stitch, tighten the Magic Ring. 8 stitches.
Round 2: 1 double crochet, 2 double crochet in next stitch, 1 double crochet,
in the 2 chain space -> slip stitch, 5 chain, 1 triple treble , 5 chain, slip stitch (first ear),
put 2 double crochet into the stitch between the two 2 chain spaces,
in the 2 chain space that follows -> slip stitch, 5 chain, 1 triple treble , 5 chain, slip stitch (second ear),
1 double crochet, 2 double crochet in the next stitch, 1 double crochet, 2 double crochet in the last stitch. Mark your last stitch and keep marking the last stitch of every round that you complete. 12 stitches.
It might look something like this:

Round 3: 1 double crochet into each of the next two stitches, 2 double crochet into the third stitch, 1 double crochet, missing the slip stitch we’re going to work on the first ear.
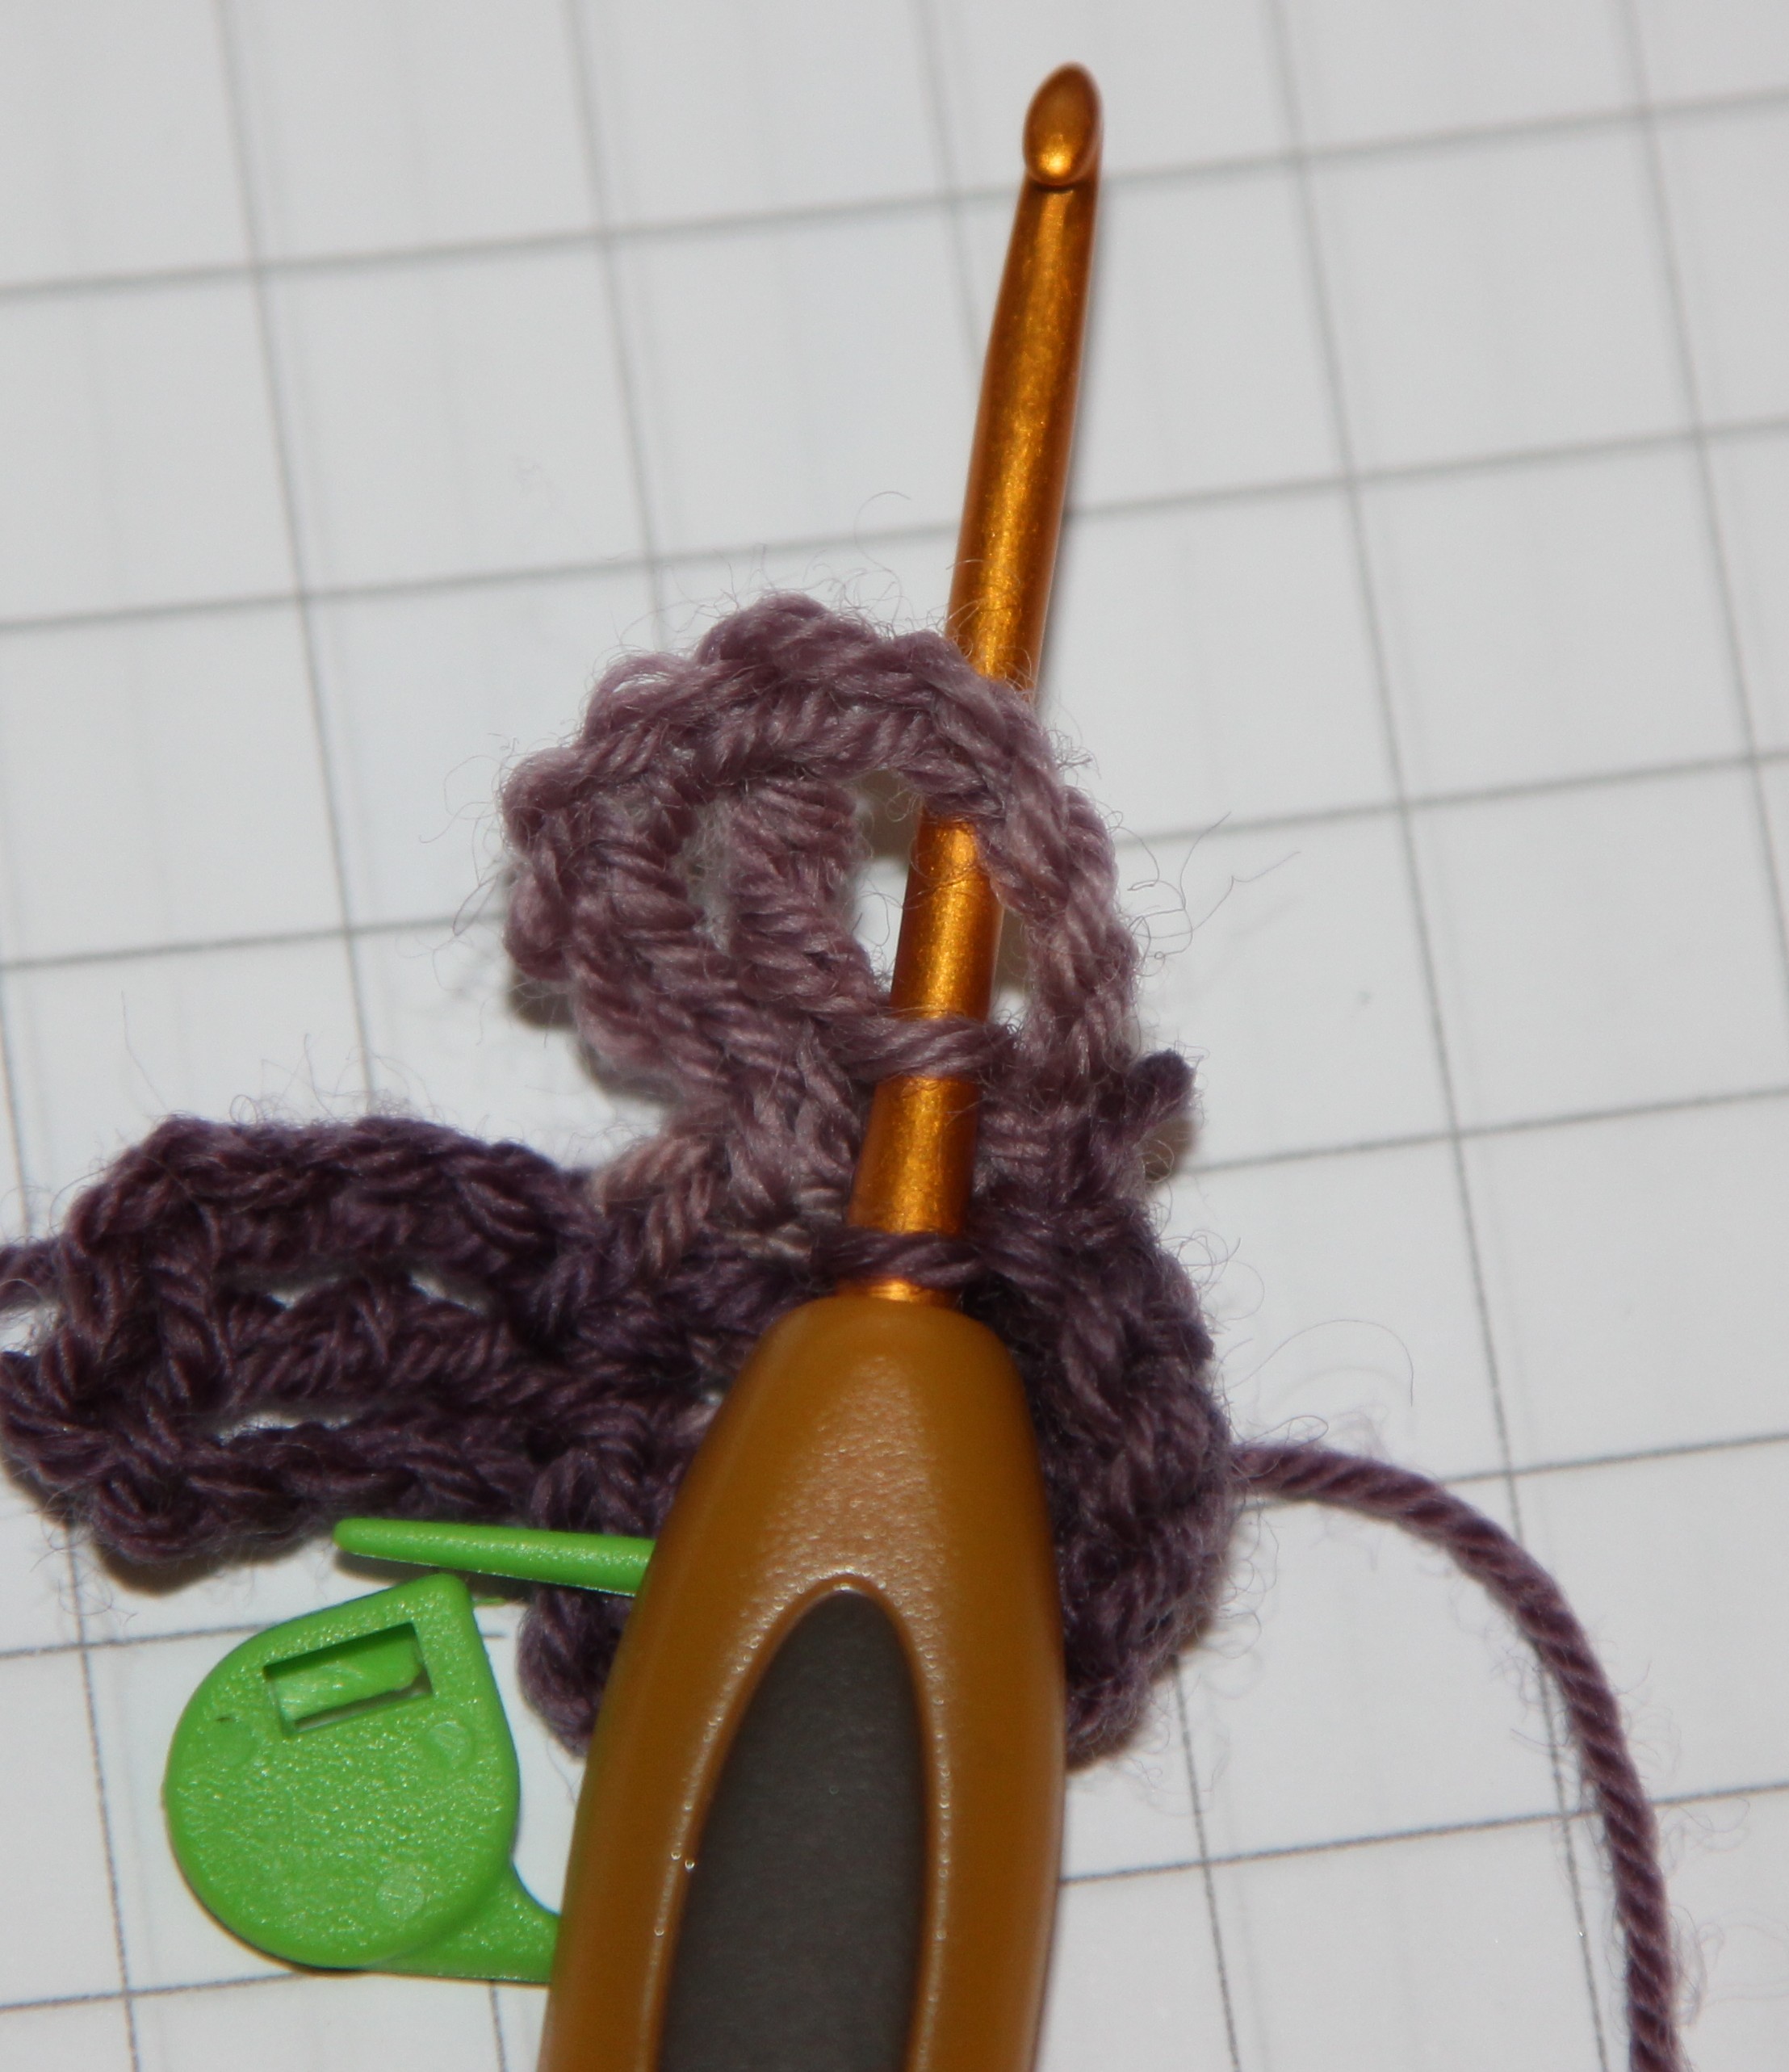
->What I’d like you to do is to look at the picture below. We’re going to work 3 double crochets into the post of the triple treble and the first 5 chain at the same time, so I want you to put your hook through the post of the triple treble and then under 5 chain. Once you have that, make a double crochet. Do that three times.
It’s going to look like this:
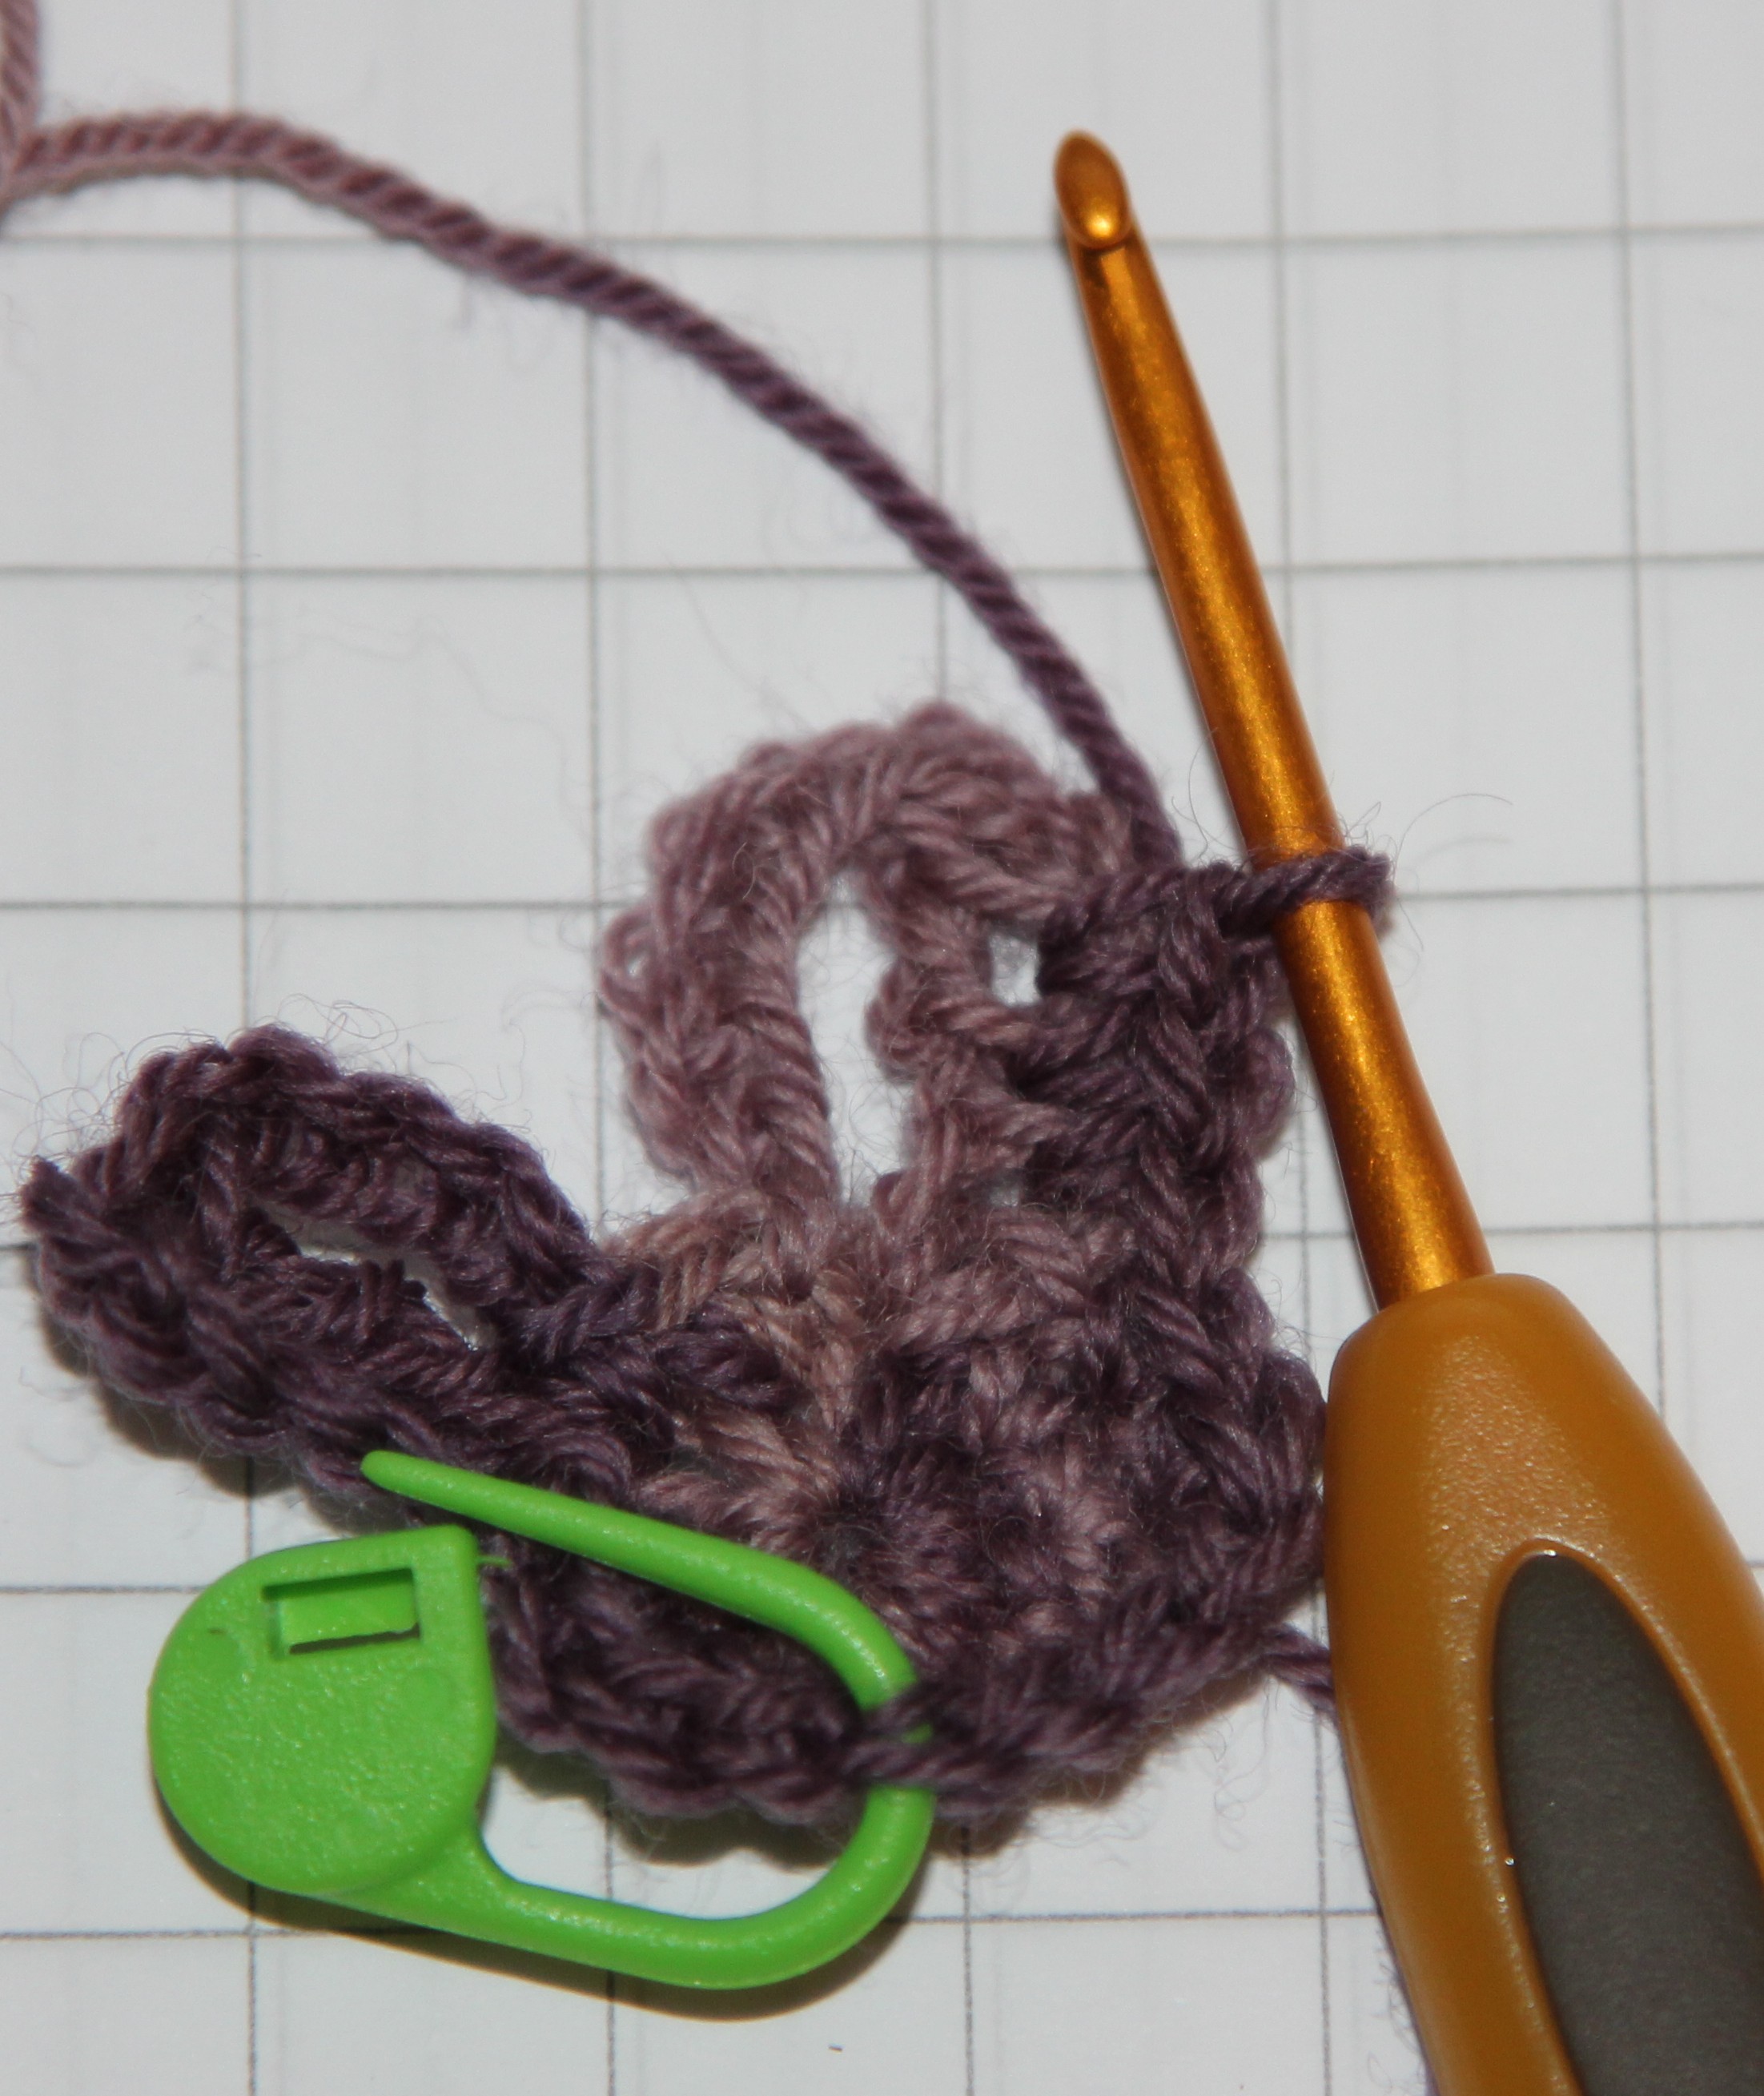
Now I’d like you to put 2 more double crochets into the first 5 chain. Now find the top of the triple treble, put 1 double crochet, 3 chain and another double crochet in here.

Lastly, two double crochet in the second 5 chain, three more double crochet into the other side of triple treble and the 5 chain together.

Phew! That’s the first ear.
There are two stitches between the ears, 1 double crochet into the first stitch, two double crochet into the second stitch. Avoiding the slip stitch we’re now going to make the second ear.
-> 3 double crochets into the post of the triple treble and the first 5 chain. 2 double crochet into the 5 chain. Into the top of the triple treble put 1 double crochet, 3 chain, 1 double crochet. Come back down the other side of the ear doing two double crochet into the 5 chain, 3 double crochet into the 5 chain and the post of the triple treble. Second ear complete!
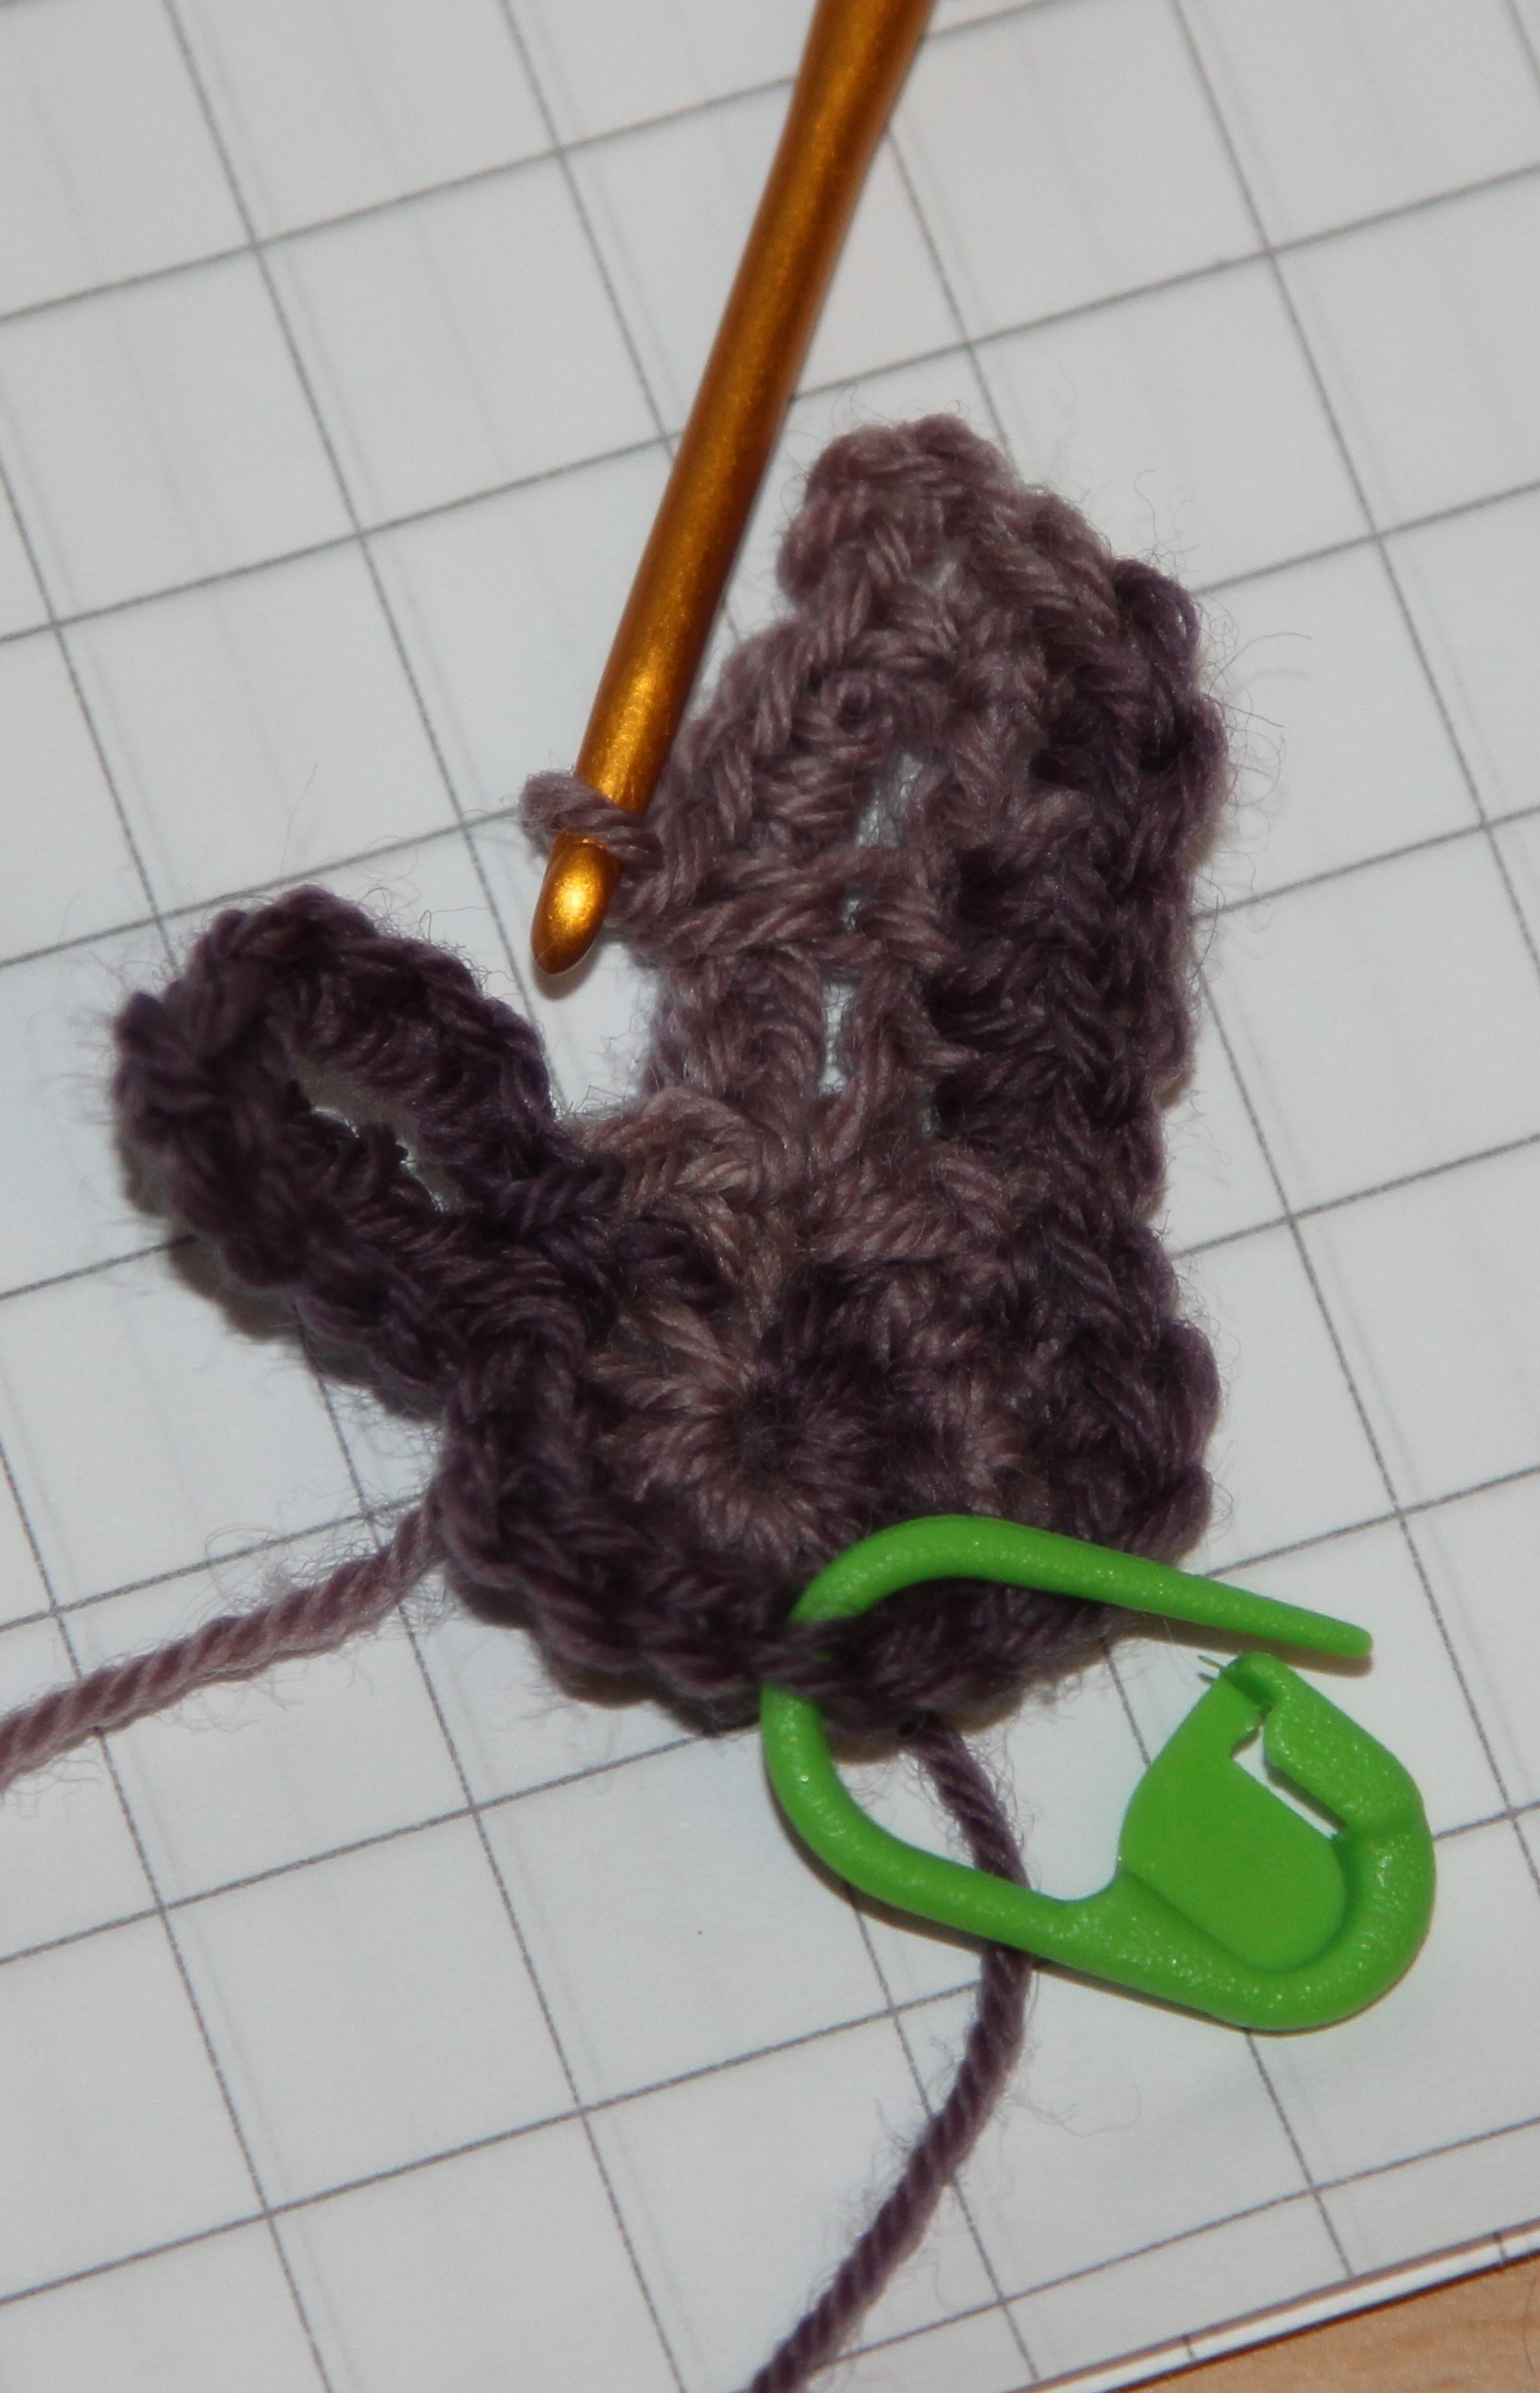
(1 double crochet into the next two stitches, two double crochet into the next stitch) x 2. Mark your last stitch. 16 stitches.
Round 4: 1 double crochet into each of the first five stitches of the round, bending your circle and going around the back of the ear 1 double crochet into each of the 3 stitches between the ears, bending your circle and going around the back of the second ear 1 double crochet into each of the last 8 stitches of the round. 16 stitches.
Rounds 5-7: spiral around your bunny’s head for three rounds, 1 double crochet into each stitch. 16 stitches each round.
Decreasing for the neck.
Round 8: (1 double crochet in the next two stitches, two double crochet together, perhaps trying the invisible decrease i.e. using the front loops only) x 4. 12 stitches.
Round 9: 1 double crochet into each stitch. 12 stitches.
Making the body.
Round 10: (1 double crochet in each of the next two stitches, 2 double crochet in the next stitch) x 4. 16 stitches.
Round 11: (1 double crochet in each of the next three stitches, 2 double crochet in the next stitch) x 4. 20 stitches.
You can partially stuff the head now if you like, or leave it to the end. You decide what’s best for you.
Round 12: (1 double crochet in each of the next four stitches, 2 double crochet in the next stitch) x 4. 24 stitches.
Rounds 13-14: More spiralling around, this time we’re making a body. 1 double crochet into each stitch. 24 stitches each round.
Decreases for the body.
Round 15: (1 double crochet in each of the next four stitches, two double crochet together) x 4. 20 stitches.
The tail (scut) round.
Round 16: (1 double crochet in each of the next three stitches, two double crochet together) x 2, 1 double crochet in the next two stitches.
In the next stitch, make a tail. -> Use a popcorn stitch that sits to the front of the work. Mine was something like this one . You might want to choose some contrasting yarn for your tail. You might want to make a really large tail or a small one, if so, vary the number of stitches that you include. I used 4 trebles for my tail.
Two double crochet together.
1 double crochet in each of the next three stitches, two double crochet together. 16 stitches.
Tidying up the bottom of the bunny.
Round 17: 1 double crochet in the next 8 stitches, push the tail forward, 1 double crochet, 1 double crochet directly behind the tail, 1 double crochet in each of the last 6 stitches. 16 stitches.
Round 18: (1 double crochet in each of the next two stitches, two double crochet together) x 4. 12 stitches.
Round 19: (Two double crochet together) x 6. 6 stitches.
Stuff and then finish off using the Ultimate Finish that I mentioned at the beginning.
Enjoy!
Here’s the pattern on Ravelry.
This is a free pattern. Please let me know if you make a version or if you find any mistakes. This is my intellectual property, don’t use the pattern to your commercial advantage without asking first and then, you know, gaining permission. I retain the moral right to be identified as the author.

